The full path name of the PCS control table. There is no need to create the table, PCS will automatically create it.
-command_q
The full path name of a two-way-server-queue that PCS uses to communicate with the Monitor Process. There is no need to create the queue, PCS will automatically create it.
-holidays
A yes/no switch indicating whether the Monitor/Scheduler should use the Holidays Table.
-auto_start
A yes/no switch indicating whether the Monitor/Scheduler should automatically start processes when the user starts the Monitor. PCS will not start process until the user explicitly submits a Start Process Command through the PCS Main screen.
-local_module
A yes/no switch indicating whether the Monitor/Scheduler should ever start processes that run on remote modules. Using this switch allows to maintain a single table that will be used throughout the system and the monitor will start only processes that are designated to run on the current module.
-log
A full/relative path of the Scheduler's log file.
-lams_input_q
The path name of the SPS/Logs & Alert Manager main input queue. You may use this option to send messages directly into the LAMS system.
-users
Use this argument to define which users should receive all system messages. For example, every time a process is started or completes, the monitor sends a message to the terminal's 25 line. By default, messages are sent to the user who started the monitor. You may use this field to add more user names to this notification.
Introduction
The SPS/Application Scheduler-Monitor is a complete, integrated package designed to control and monitor all applications running on the system. The Monitor automates all application startups, shutdowns and recovery procedures based on predefined time schedules. SPS allows complete automation of batch cycles and keeps on-line applications up and running at all times. Single-point control of operations at all application levels minimizes risk of human error and prevents production disasters.
The scheduler_server.pm program
Purpose
Start this program in the background using scheduler.pm -command start_server or if you need to change any of the default parameters, by using VOS' start_process command.
CRT Form
 -------------------------------- SPS/Scheduler -------------------------------
 -data:         %softmark#d03>SPS>scheduler>logs>scheduler.data
 -command_q:    scheduler_cq
 -holidays:     yes
 -auto_start:   no
 -local_module: no
 -log:          %softmark#d03>SPS>scheduler>logs>scheduler_log
 -lams_input_q:
 -users:        Soft.SysAdmin
Lineal Form
scheduler_server.pm 	[-data] [-command_q]  [-holiday]
				[-auto_start] [-local_module]
				[-log]  [-lams_input_q]   [-users]
Arguments
-data
e - Edit Process Configuration |
Enter an 'e' next a process name to execute this command. The command will bring up the Process Definition Screen. All process definition components will appear on this screen. At this point you may modify any data item. Pressing the Enter Key will complete the update including sending the new definition to the Monitor Process. Pressing the Cancel Key will cancel all changes made to the screen and leave the process definition unchanged.
|
a - Display Process Activity |
Enter an 'a' next a process name to execute this command. The command will scan the Monitor's Log and collect all the events related to the marked process name. PCS will write the result to a temporary file and then be display it.
|
s - Start Process |
Enter an 's' next a process name to execute this command. The command will send a Start Process command to the Monitor Process. PCS will start and monitor the process. This command overrides the Suspend-Switch setup.
|
t - Terminate Process |
Enter a 't' next a process name to execute this command. The command will prompt the user for a confirmation and then send a Stop Process command to the Monitor Process. The Monitor will then stop the process.
|
b - Bounce Process |
Enter a 'b' next to a process name to execute this command. The request will first stop the process and then restart it. The request combines the logic of the start and terminate requests.
|
p - Change Priority |
Enter a 'p' next a process name to execute this command. The command will prompt you for the new priority and then will assign it to the running process.
|
o - Display Out-File |
Display Process' Output File. Enter an 'o' next a process name to execute this command. The system will locate the marked process' OUTPUT_FILE and display it on the terminal. PCS sets an Implicit Lock on output_files. This allows the user to display these files while the process is still running.
|
d - Delete Process |
Enter a 'd' next a process name to execute this command. The system will prompt for a confirmation on the delete command and then remove the definition of the marked process from the configuration file. The user cannot execute this command while the process is running.
|
c - Copy Process |
Enter a 'c' next a process name to execute this command. This command is used to clone existing process definitions. The system will prompt for a new process name.
|
r - Reschedule |
Enter an 'r' next to a process name. If the process was terminated (removed from the scheduled events list), you may reactivate it with this request.
|
i - Information |
Enter an 'i' next a process name to execute this command. PCS will execute the list_users command for the selected process name. To return to PCS, press the Cancel key.
|
h - History |
Enter an 'h' next a process name to execute this command. PCS will display information of the last 15 activities for the selected process including time-started, time-completed, elapsed-time and completion code.
|
? - Help |
Enter an '?' next a process name to execute this command. The system will show the user the Help file that was defined for the marked process.
|
The Main Screen - Function Keys
Paging Keys |
The user uses the Paging Keys when more than one page of process listings is available. The number of pages and the number of processes are indicated on the top right side of the screen.
|
Add Process Key |
The Add Process command will bring up the Process Definition Screen. All process definition components will appear on this screen. Enter all required data elements as described under "Process Definition Components." Pressing the Enter Key will complete the ADD operation, including sending the new definition to the Monitor Process. If the SUSPEND option is not set then the Monitor Process will start the new process. Pressing the Cancel Key will cancel the ADD command.
|
Search Key |
The Search functions allow you to easily find a specific process. To execute the search, enter the name or partial name of the process you are interested in including wildcards (using asterisks) and press the Search key. To repeat the search, press the Search function again for the next occurrence.
|
The Calendar Key |
The Calendar command will bring up the SPS Calendar program. The Cancel-Key will quit the Calendar and return to the Main Screen. The SPS Calendar program is documented later.
|
The List Users Key |
The List Users command will evoke the standard VOS list_users command. Using it will allow to check on running processes without canceling and leaving the PCS on-line session. The user may modify the command as follows: !set_external_variable env_list_user_command -in scheduler.pm -to '!list_users -interval 5' |
Project Key |
The Project Key will allow you to execute the start/stop/bounce-project requests from the Main Screen.
|
Process_Name |
A unique name that identifies the process throughout the system.
|
Project Name |
The name of the logical Project or Group the process belongs to. This is an optional feature that later on, will allow you to start and/or stop groups of processes. For more information see the sps_pcs command description.
|
Document |
The name of a text file that documents the process. Use this feature to provide the operator with on-line documentation and daily instructions. The user obtains the Help File by typing an "h" in front of the process name on the Main Screen. All documents must be created in the SPS>scheduler>documentation directory.
|
Command_Line |
Defines the command PCS will execute. The user may define any VOS or user-defined internal, external, programs and/or command macros.
|
Output Path |
The full path name of a file or an I/O device. The process will attach its default_output_port to this path. If the user does not provide a value for this field, PCS will use the Process Name as the Output File name, for example, [process_name].out.
|
Current_Directory |
The full path name of the directory from which PCS will start the process.
|
Shutdown Command |
A relative/full path name to a command macro or a program name that should be used to stop the process. By default, the monitor uses the VOS stop_process command to stop processes. The Shutdown Command may be used if more graceful shutdown procedures are required. If you choose this option, make sure that your procedure causes the process to stop.
|
Module_Name |
The full name of the module on which PCS will start the process. If not provided, PCS will use the current_module name.
|
Priority |
Defines the system priority that PCS will assign to the process at startup time. Valid values are 0-9 and -1 (same as the evoking process).
|
Privileged |
A yes/no/same cycle field that defines the privileges of the process.
|
CPU_Limit |
An optional feature that allows you to automatically stop processes that consume unexpected amounts of CPU. Specify time limit in seconds. Process that was stopped for exceeding its CPU limit will terminate with VOS error number 3439-e$kill_this_process and will not be automatically restarted by the Monitor.
|
Dependencies |
This is a display only field that shows the number of dependant processes.
|
Suspend |
A yes/no switch that used to suspend the process. PCS will not start automatically suspended process.
|
Queue |
This feature allows the use of multiple Monitor Servers (scheduler_server.pm). Within the PCS screens you can define which Monitor server is responsible for the process by specifying the Monitor's unique queue name. If you choose to use this option, that queue name used must match the queue used by one of the running servers. For more information see the "-command_q_path:" argument when starting the Monitor program (scheduler_server.pm).
|
Security ID |
A Security ID that allows you to associate critical processes with the SPS standard security layer for user_name, password, terminal and time-of-day validations. For more information, refer to the SPS/Security table appendix.
|
Start_At |
A standard VOS date_time string that defines when PCS should start the process. If the user leaves this field with blanks, then the process will have no scheduling and will start when the Monitor comes up. For valid date_time formats, see the VOS documentation on the s$cv_to_int_date_time command. Examples: 18:00, 94-12-09 08:00. Tuesday 18:00.
|
Days_Of_Week |
A seven-character string that defines the days of the week on which the process may run. Valid characters in this string are 'Y' (yes) and 'N' (no). For example, a 'NYYYYYN' means that the process may run only on weekdays and that PCS will not start it on Saturdays (7) and Sundays (1).
|
Stop_At |
A standard VOS date_time string that defines when PCS should terminate the process. The feature allows to automatically stop running processes at a specified time. For valid date_time formats, see the VOS documentation on the s$cv_to_int_date_time command.
|
Run_On_Holidays |
A yes/no switch that defines whether the process should run on holidays. Use the sps_holidays.table to define the holidays and non-business days.
|
Startup Delay |
When the Monitor (scheduler_server.pm) is started, it reads the configuration and starts each processes one after the other in sequence. You should use this field only if, due to timing conditions, your applications require some delay between subsequent startups. Specify the delay in seconds.
|
Interval |
A valid VOS Relative Time Expression (see documentation on the s$cv_to_int_date_time) that defines the intervals between each process re-submission. The system will automatically start the process based on this Interval. When left blank, PCS will run the process only once. Examples: + 1 day, + 1 hour + 30 minutes , +1 month
|
Completion_Window |
A time specified in minutes indicating a successful completion. This is used internally by the scheduler when evaluating dependant processes. This will be best explained by an example: Process B is scheduled to run at 18:00 and is dependent on the successful completion of process A. Process A has a completion window of 60 (1 hour). At 18:00 PCS will look at the last run of A before starting process B. If A has completed successfully after 17:00 (within the last hour), it will go ahead and start process B, otherwise it will report an error indicating that B was not started because process A has not completed successfully.
|
Start process |
A name of another PCS process you wish to start the current job completes.
|
Restart ___ time(s) |
In the case of a process failure, this field defines how many times to automatically restart the process. By default, a failed process will not be restarted. It is recommended not to exceed 2-3 attempts to restart a failed process. Allowed values are 0 to 9.
|
Normal |
Any standard VOS command that PCS should execute when the process completes successfully. Using this field allows chaining of processes, for example, process B will start after process A. The system will issue an equivalent of a start_process command on the command that you specify. There are two ways of using this feature:
|
Failure |
Any standard VOS command that PCS should execute when the process aborts. Using this field allows the definition of any recovery procedures. The Failure command will be triggered after the process was unsuccessfully restarted (if restart attempts was specified). Note that the Monitor detects application failure by examining the VOS command status. Make sure that your failed application does not reset the command status before terminating.
|
Last Modified By |
Specifies the name of the user who last modified the process definition. This is an output-only field automatically set by SPS.
|
Last Modified At | Specifies the date and time of the last change to the process definition. This is an output-only field automatically set by SPS. |
Two standard-VOS data-time fields that define the time range of the report. Be default the system selects the current day.
-process
An option that allows the user to select log records that relate to the specified process name(s). If the user does not provide a value, all processes will be selected. Star-names are supported.
-project
An option that allows the user to select log records that relate to the specified Project name(s).
-counts_only
When set, the program will produce a "counts-only"-formatted report.
-did_not_run
When set, the program will produce a "Did-Not-Run" report listing only processes that have not completed within the report's timeframe.
-failed
When set, the program will produce a report listing only processes that have failed within the report's timeframe.
-process_definitions
When set, the report will include all process-definition data as stored in the configuration database (logs>scheduler.data).
-data
The relative or full path name of the configuration database (logs>scheduler.data).
-log
The relative or full path name of the audit file.
-output_path
The relative or full path name of the report file.
-html
The reports can be created in either plain TEXT or in the HTML path. The HTML-formatted report(s) can then be email-ed to selected users.
-browse
When producing TEXT reports, you may choose (if set to "yes") to view the report using the SPS/Browser facility.
-email
When producing HTML-formatted reports, you may choose to send it via you E-Mail Server to selected users. If so, simply enter their email addresses as you would in your favorite email program.
Process Definition Screen - Function Keys
--------------------------------- Dependencies -------------------------------
 -dependant_process_1:
 -dependant_process_2:
 -dependant_process_3:
 -dependant_process_4:
 -dependant_process_5:
The scheduler_report.pm program
Purpose
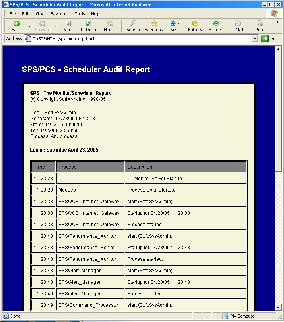
The scheduler_report.pm command creates either ASCII/TEXT reports or HTML-formatted reports which it then sends to selected users via an Email Server.
CRT Form
----------------------------- SPS/Scheduler Report ---------------------------
 -from:                06-02-11_00:00:00_est
 -to:                  06-02-11_23:59:59_est
 -process:
 -project:
 -counts_only:         no
 -did_not_run          no
 -failed               no
 -process_definitions: no
 -data:                %softmark#d03>SPS>scheduler>logs>scheduler.data
 -log:                 %softmark#d03>SPS>scheduler>logs>scheduler_log
 -output_path:         %softmark#d03>SPS>scheduler>logs>scheduler_rep
 -html:                no
 -browse:              yes
 -email:
Lineal Form
scheduler_report.pm 	[-from] [-to]  [-process]  [-project]  [-counts_only]
	[-did_not_run]  [-failed]   [-process_definitions]  [-data]  [-log]
	[-output_path]  [-html]  [-browse]  [-email]
Arguments
-from .... -toEmail-ed HTML-formatted reports
Process Definitions Report
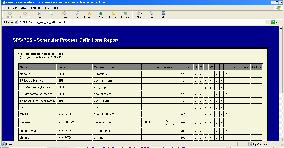
Click to enlarge.
Process Activity Report
Click to enlarge.
The Holidays Table (sps_holidays.table)
The Holidays table (SPS>configuration>sps_holidays.table), is basically a list of holidays. You'll need to update it once a year and create it. You need to enter dates in the standard yy-mm-dd format.
organization: relative;
index       : holiday  no_duplicates;
fields      : holiday  char (8);
end;
Getting Started
| Start the Monitor | scheduler.pm -command start_server Wait for a message on your 25th line from the server indicating that the Start-Up completed. |
| Start the User's Interface program | scheduler.pm Define your first process Press the ADD-Key, the Detail Screen will appear.Name the process TEST, using the display_disk_info command. Don't change any other parameters. Press Enter. |
| Start the TEST process. | On the Main Screen, enter 's' in front of the process name and press Enter. Wait of the Process Started message and Process Completed messages. |
| Examine the *out file. | On the Main Screen, enter 'o' in front of the process name and press Enter. For more information on how to scroll and use this browsing facility, see the documentation on the SPS/Browser or press the 'h' key for a list of valid request. Press the Cancel-Key to return to the PCS Main Screen. |
| Modify the command_line and schedule the process for 18:00. | Edit the TEST process (use the 'e' command) and enter '18:00' in the start-at field. Modify the command line to sleep -seconds 30. Make sure that the process is not suspended (see the Suspend Switch) and press Enter. Wait for the Process Modified message. The Main Screen now indicates that the process is scheduled to run at 18:00. |
| Start the TEST process | On the Main Screen, enter 's' in front of the process name and press Enter.The Main Screen will now indicate that the process is running. |
| Change the process' priority | On the Main Screen, enter 'p' in front of the process name and press Enter. On the CRT form, enter the new priority and press Enter. |
| List currently running processes | Press the Users-Key. PCS will execute the VOS list_users commands. Verify that the priority is set properly. |
| Stop the TEST process | On the Main Screen, enter 't' in front of the process name and press Enter. Respond with a 'y' to the confirmation message. |
| View the Daily Activity for TEST | On the Main Screen, enter 'a' in front of the process name and press Enter. |
| Modify the Days Mask | Edit the TEST process definition and mark the current day with 'n' and press Enter. Notice the PCS scheduled the TEST process to run the next available day at 18:00. |
| Experiment with other PCS functions | Press the Monitor-Key for a listing of pending events.Press the Calendar-Key to learn about the SPS/Calendar program.Press the Log-Key to get an activity report. |